Tips for using MWA on your mobile device
Table of Contents
Accessing the MWA tool
- Go to https://app.smartsheet.com/b/form/c8c681e6ff8e4da88b4d6d134efdd63e
- NOTE: If you see a banner at the top of the page, it is NOT necessary to download the Smartsheet app.
Creating a quick link to MWA on your mobile phone (No installation required)
iOS

-
- 1. Make sure you can see the navigation toolbar by tapping once near the bottom of the screen, making it appear. On the navigation toolbar at the bottom of the screen, tap the Share icon (the rectangle with an upward arrow).
- 2. Use your finger to pull it up and swipe through the list. Tap “Add to Home Screen.”
- The command, “Add to Home Screen” will appear. Use this command to keep the name as is or shorten it to “MWA”, then click “Add”.
- 3. The icon for MWA will appear on your Home screen. Tap on the shortcut as if it were a regular app. Safari will automatically open and load MWA.
- 1. Make sure you can see the navigation toolbar by tapping once near the bottom of the screen, making it appear. On the navigation toolbar at the bottom of the screen, tap the Share icon (the rectangle with an upward arrow).
-
Android (Chrome)
- 1. Once the website loads, open Chrome’s Settings menu by tapping the three vertical dots found in the top-right corner.
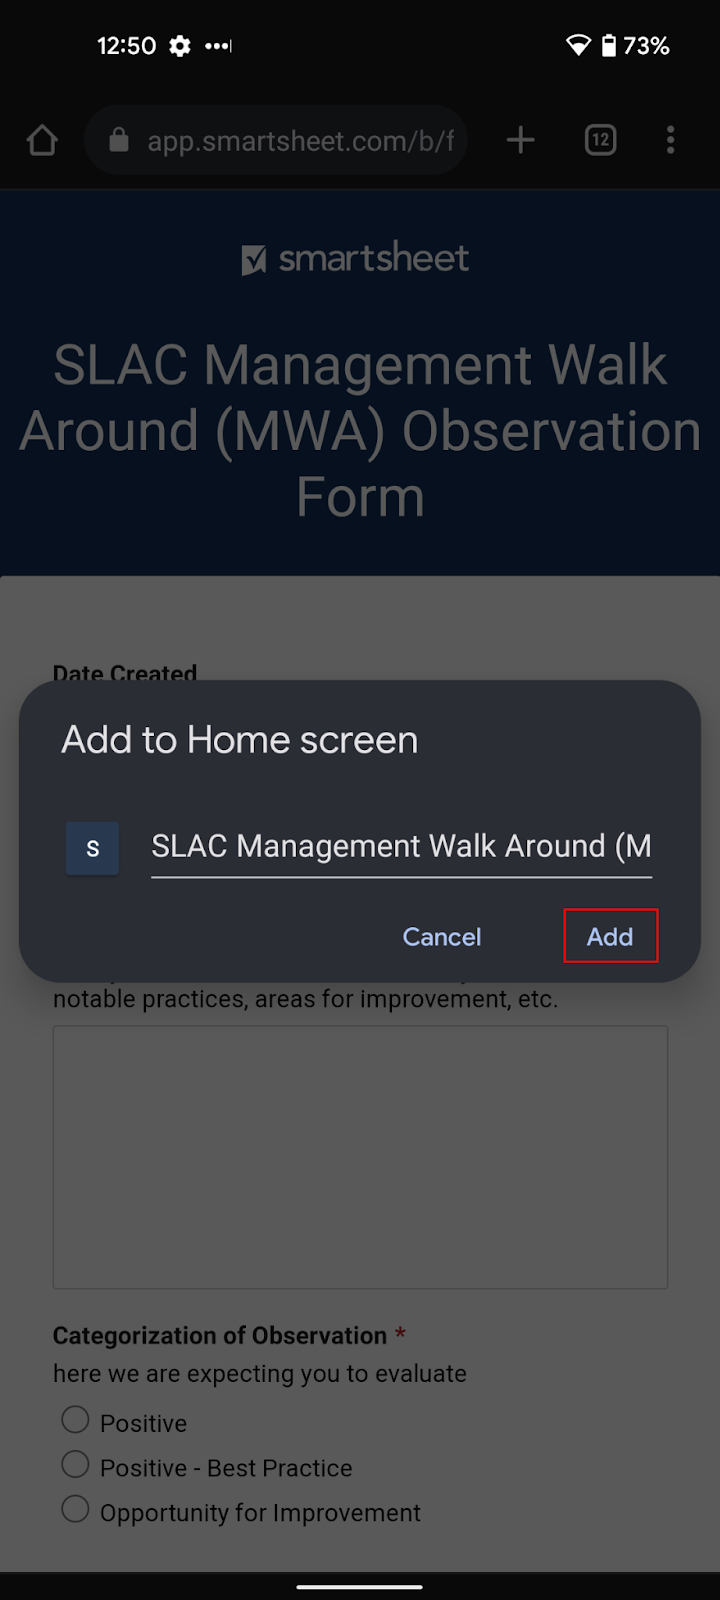
- 2. Choose the “Add to Home screen” menu item
- 3. Keep the name as is, or shorten it to “MWA” and click “Add”
- 4. A new screen that will allow you to place the icon automatically or choose where to place it. On this “Add To Home Screen” screen, you’ll see a preview of the shortcut’s icon. Tap the “Add Automatically” button to place the new icon on your Android device’s Home Screen wherever space is available.
- 5. If you want to place the icon somewhere different on your Home Screen, touch and hold the icon, and drag it to your desired location.
- 1. Once the website loads, open Chrome’s Settings menu by tapping the three vertical dots found in the top-right corner.


-
Android (Firefox)
1. Touch and hold the website’s URL in the address bar until a pop-up menu appears. Select the “Add Page Shortcut” option.

2. A new window will open, and you’ll see a preview of the 1×1 icon. Press the “Add Automatically” button to add the icon on your device’s Home Screen. To configure the exact location as to where the shortcut is placed on the Home Screen, touch and hold the icon, and drag it to your desired location.

NOTE: If you want to install the MWA tool (for SLAC-managed devices) or Smartsheets, go to this article: How to use install the Management Walk Around (MWA) tool on your phone
Entering a MWA submission
- Go to https://app.smartsheet.com/b/form/c8c681e6ff8e4da88b4d6d134efdd63e
- Fill out the date by clicking on the calendar icon and selecting the applicable date.
- Fill out the SLAC Building location of where the activity was observed.
- Use the Name Description to verify you have selected the correct building.
- Fill in the rest of the MWA in accordance with the Management Walkaround Guidance Cards. Guidance cards can be downloaded from https://assurance.slac.stanford.edu/management-walk-arounds-mwa
- To upload a photo to attach to the MWA submission (see more details below)
- Choose the participant(s) in the MWA.
- Choose the Directorate or Project this MWA pertains to
- (Optional) Check "Send me a copy of my responses" and fill in your email address to receive a copy in your inbox.
- Click “Submit”.
Attaching a photo to the submission
-
iOS
-
- 1. Click on the “browse files” link and:
- a) Choose “Photo Library” for a photo that you have already taken with your device or,
- b) Choose “Take Photo or Video” to take a new photo to attach.
- c) Click “Use Photo” when you are satisfied with the photo. You should see the photo’s file listed above.
- 1. Click on the “browse files” link and:

-
Android
-
- 1. Click on the “browse files” link and:
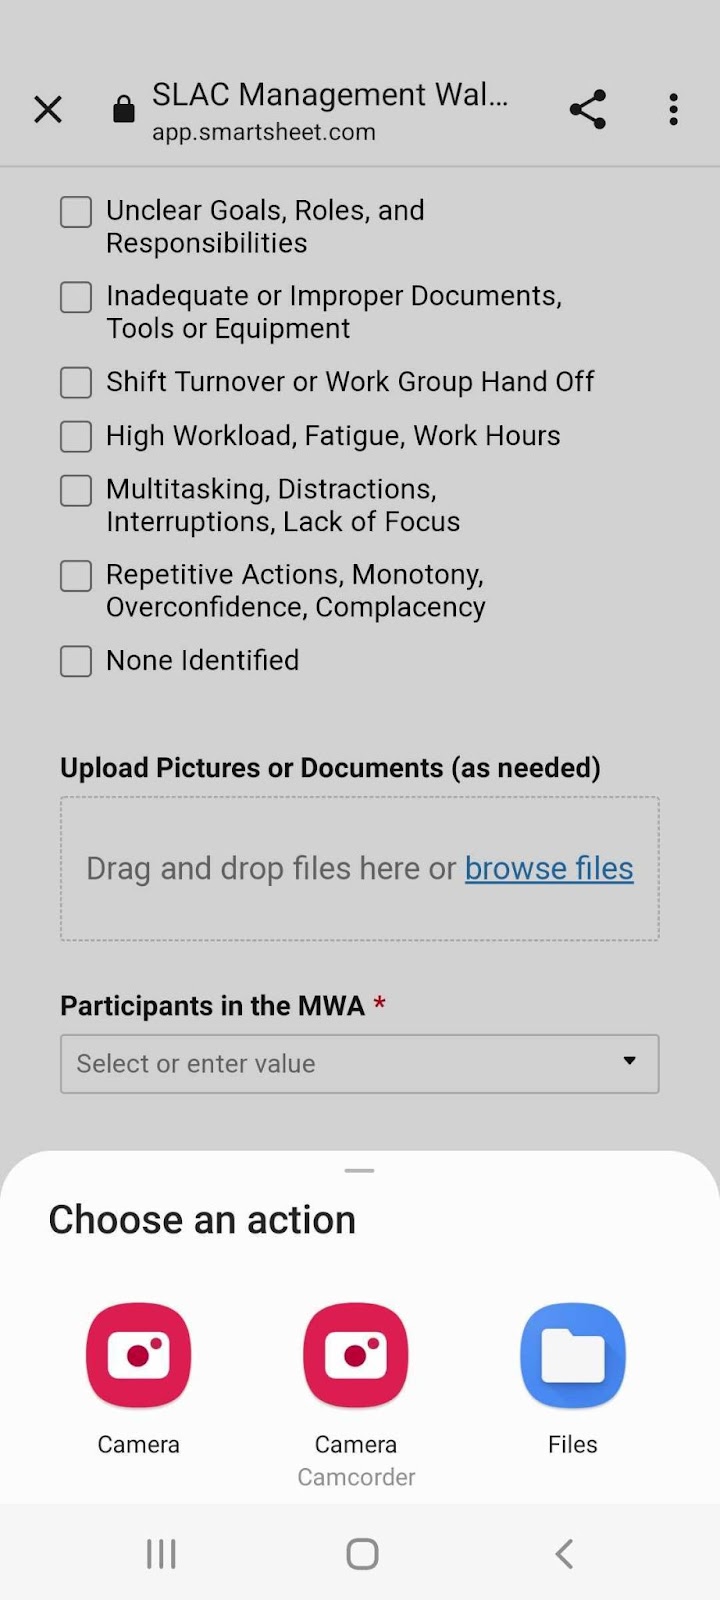
-
- 2. Choose “Files” for a photo that you have already taken with your device, or
- 3. Choose "Camera” to take a new photo to attach Click “OK” when you are satisfied with the photo.
System Requirements
- Mobile: iOS 15 or above, or Android 12 or above.
- Desktop: Windows 10 or Macintosh 11 or greater.
- Browser. Versions tested:
- Safari 15.5
- Macintosh, iOS
- Chrome
- Macintosh 12.1
- Windows 10
- Ubuntu 22.04
- iOS/Safari 15.5
- Android 12
- Firefox 91.10.0esr (64-bit)
- Macintosh 12.1
- Internet connection. Note that VPN is not required.
Getting Help
- Try restarting your device
- Update your system software and reboot
- Apple device: https://support.apple.com/en-us/HT204204
- Android device: https://support.google.com/android/answer/7680439?hl=en
- SLAC-managed device:
- SLAC-managed devices are designed to remain updated. To verify there are not any updates waiting to install:
- Macintosh
- Windows
- SLAC-managed devices are designed to remain updated. To verify there are not any updates waiting to install:
- To assist with accessing the form or using your device, contact the SLAC IT Service Desk at 650-926-4357
- To assist with the contents of the form or for support with the contents of your submission, contact Rich Poliak at rpoliak@slac.stanford.edu